Planting a Window Box - step by step
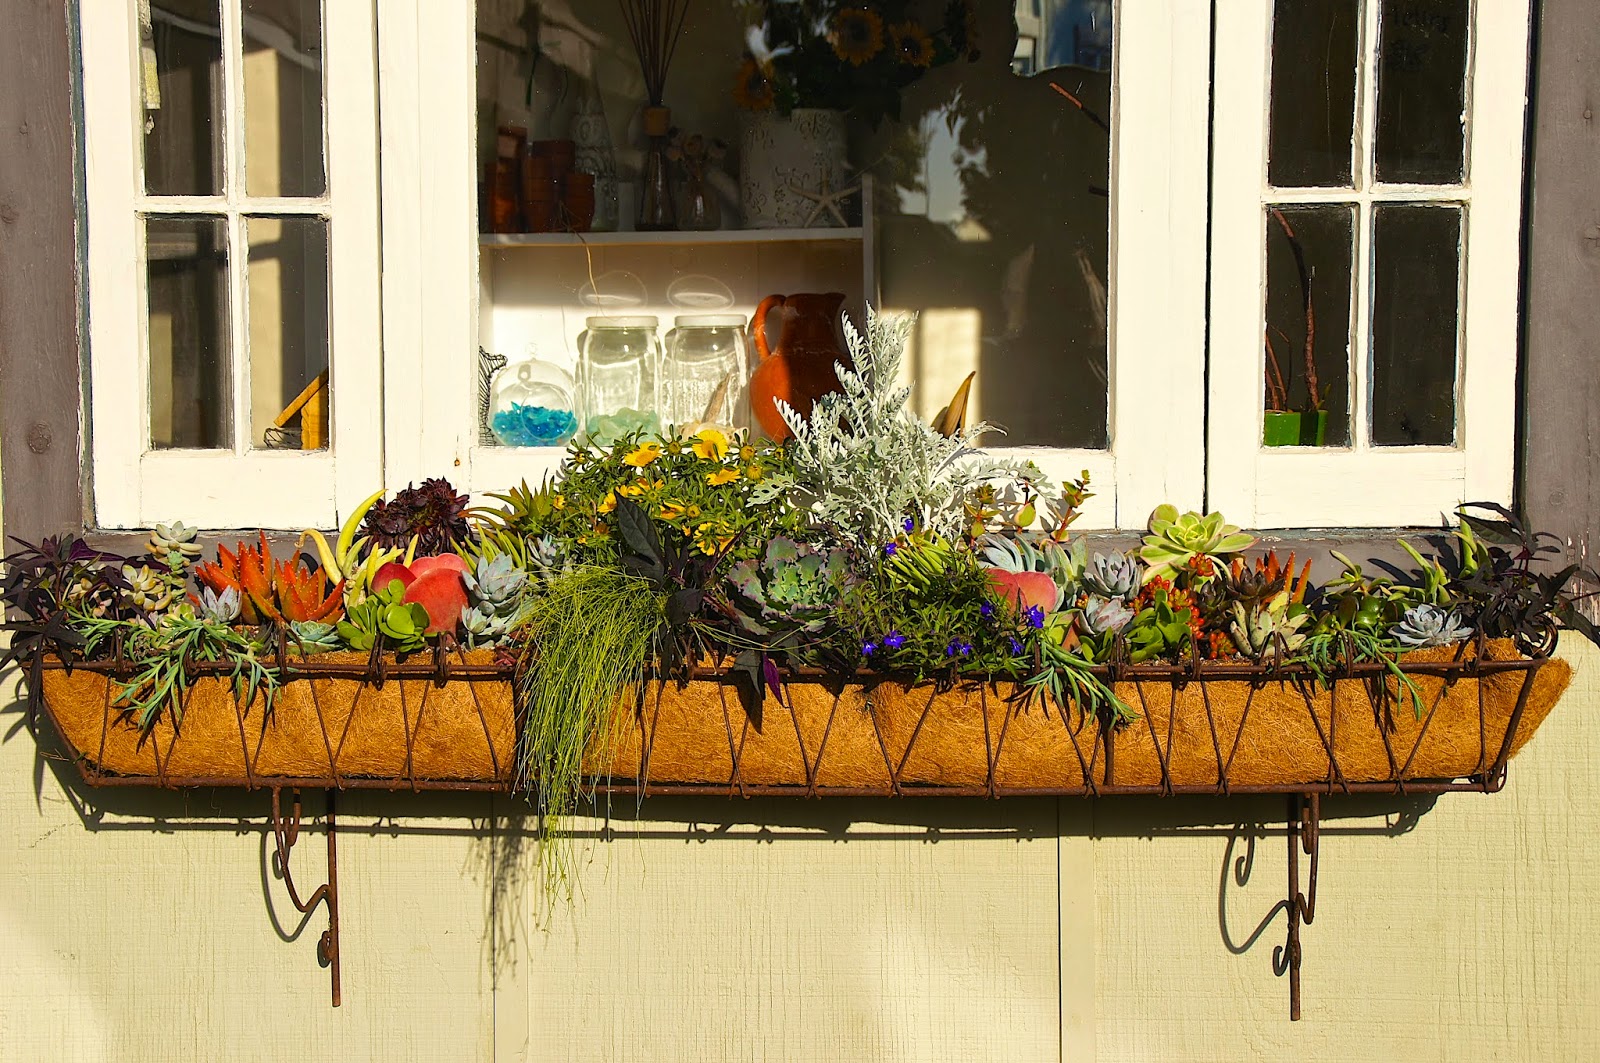 |
| Succulents and a variety of perennials add color & interest. This planter gets full afteroon sun. |
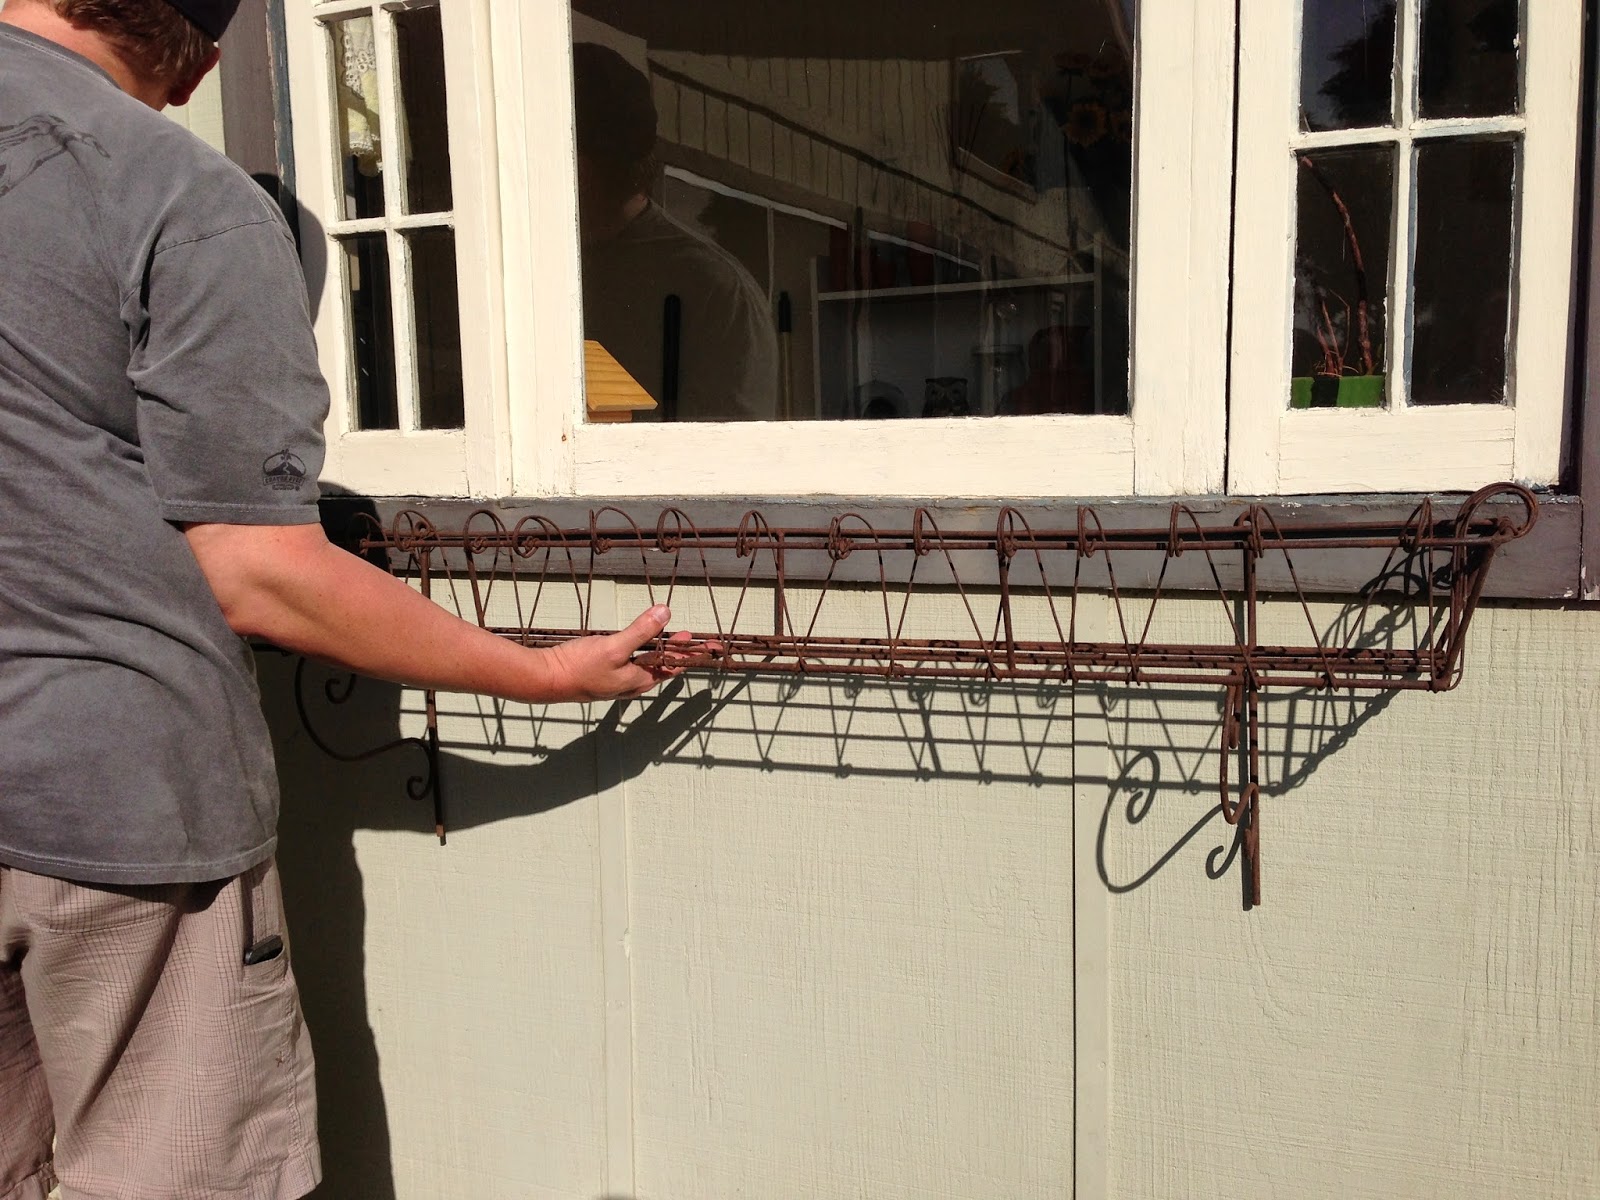
Step one was finding this amazing vintage planter. I have been looking for one for a long time. Every time I would find one they were way too expensive. I happened upon this one at Flora nursery in Ojai. I was thrilled when the clerk told me it was only $50.
 |
| Vintage window planter |
Next step was getting it mounted. I had my friendly neighborhood handy man fix it up for me and he had to use some very long screws. He added a washer on top of the mounting loop so it wouldn't slip off.
Now to get it filled. I went with the coco liner. I thought I wanted to use sheet moss, but it was $14 a foot (36" wide). The coco liner was only $3.99 a foot (36" wide). I bought two 12" x 36" sheets. I'm so glad I chose the coco liner. It looks great!
 |
| Coco liner looks neat and tidy and won't break down. |
Next I added a layer of chicken wire to make it strong. Luckily the planter has several nice strong bars along the bottom, but I always like to use chicken wire to make sure there is no sagging.
 |
| I had this chicken wire, but if I were going to buy some I would get the 1/2 in hex mesh. |
Hummmmm, what I didn't account for was how to protect and cover the back. Guess I should have had the coco liner cut wider. Well, what now? You know how it is when you are working on a project...you need to keep going. Ahhh, I know what to do. Plastic to the rescue! I used the car protection sheet they give you at the nursery. It is much stronger than garbage bags.
 |
| Adding plastic was a great solution. |
I used my drafting ruler to tuck the plastic securely over the top. It was a tight fit, so I'm glad I had something so thin to use. Next I put down a layer of window screen. You can buy it by the foot at your local lumber or home improvement store. It works great to help keep the soil from seeping through the coco liner.
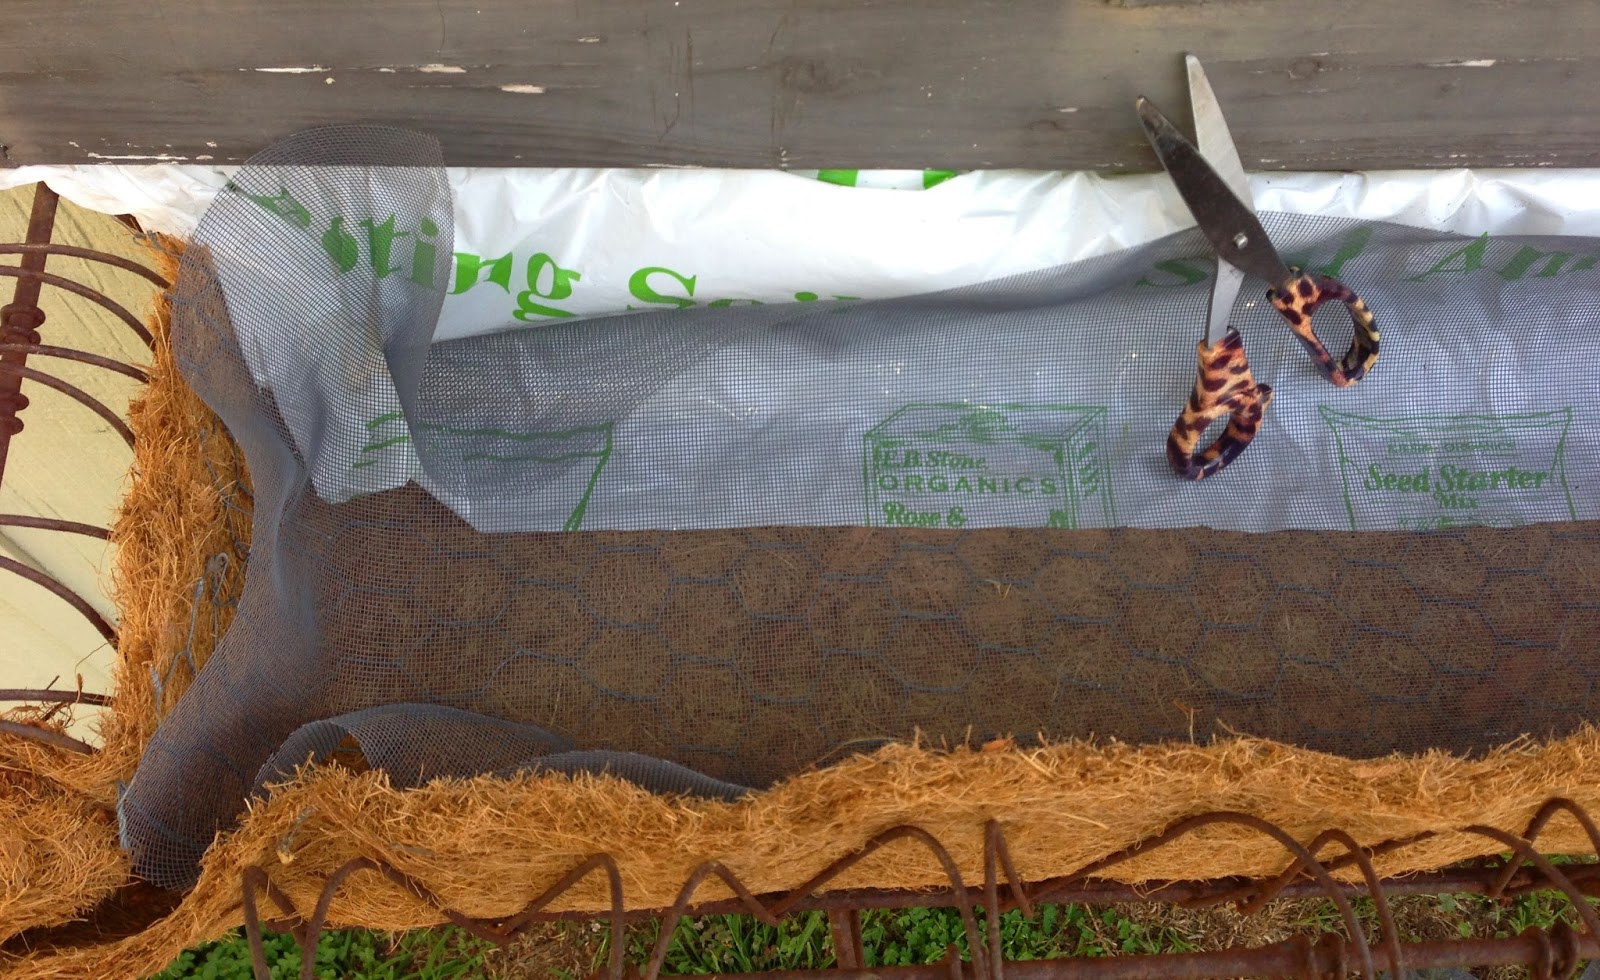 |
| Window screen liner. |
I cut it to fit and then to make sure it stayed secure, I wired the screen and the plasticall along the top of the back about every 5-6 inches.
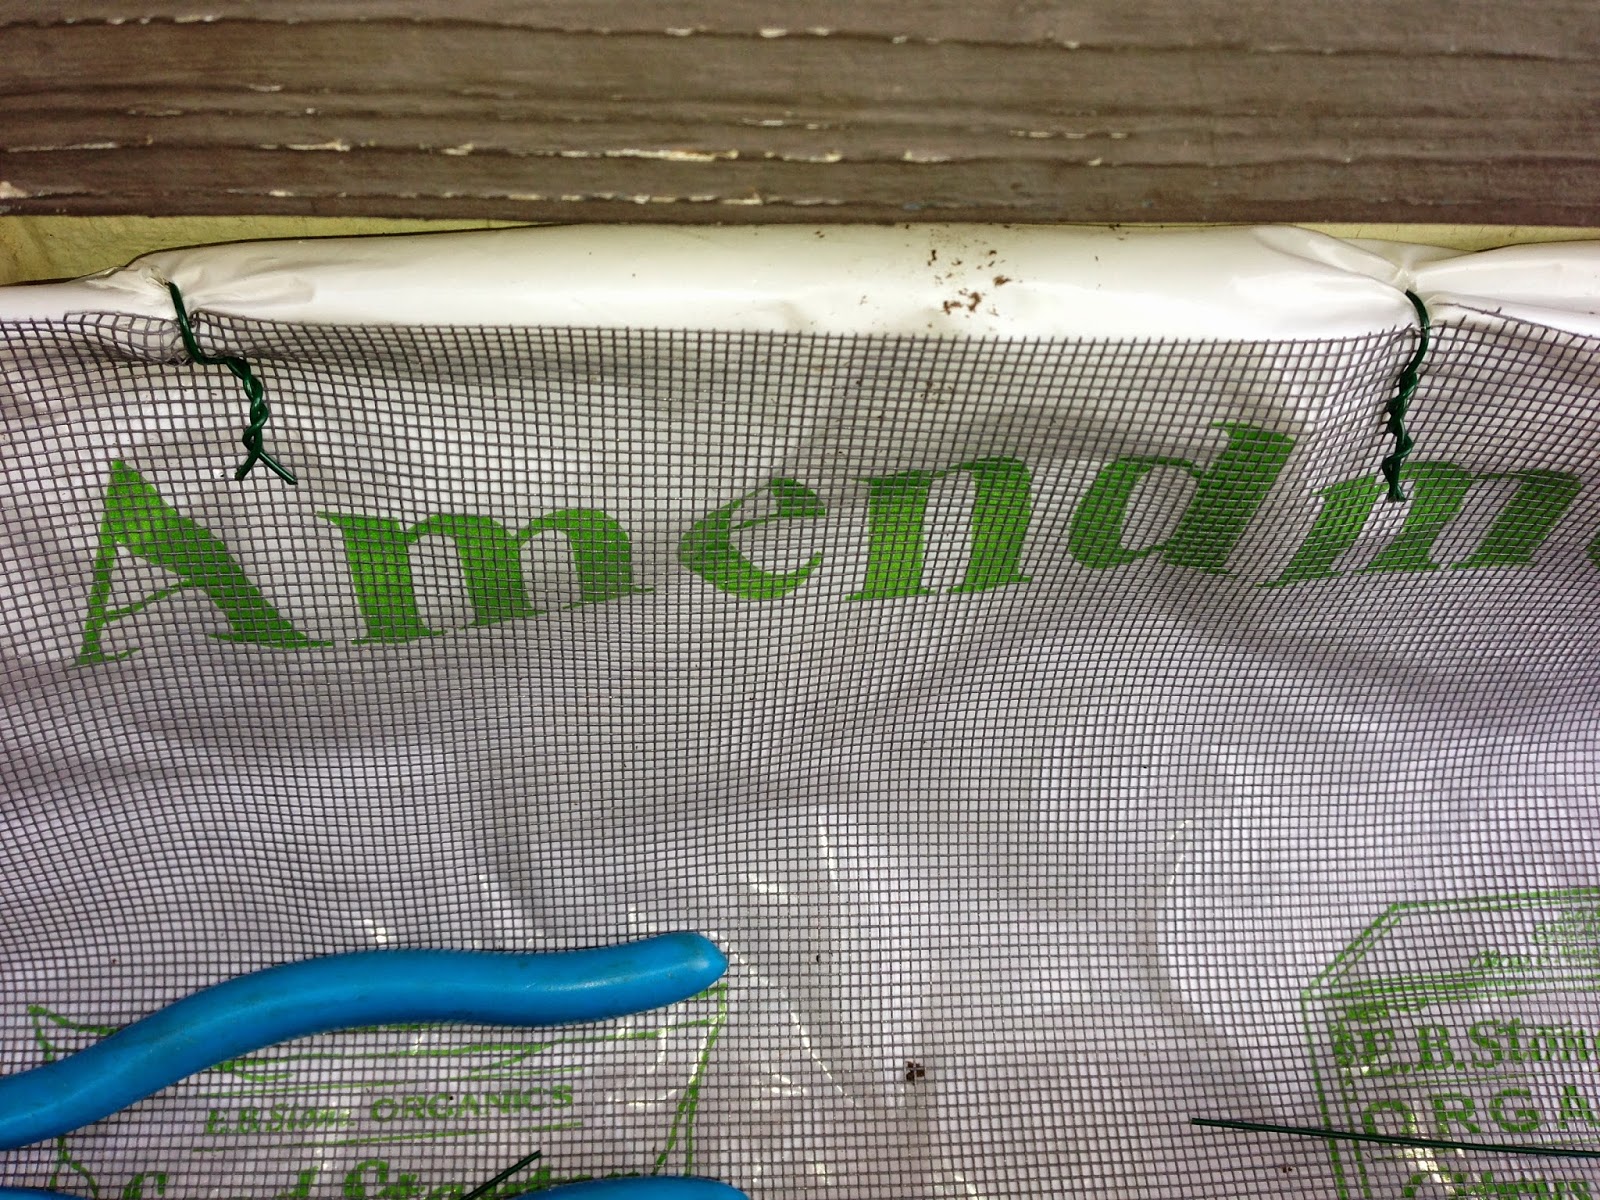 |
| Secured to the top with wire. |
I also made sure to secure it at the corners and one in the middle where the two lengths of coco liner and screen overlapped.
 |
| It takes time to get it prepared correctly. |
Now for the flowers! I bought sweet potato vines and several other plants and succulents that will trail down over time. I love succulents, but I wanted other textures and colors including a few flowers plants.
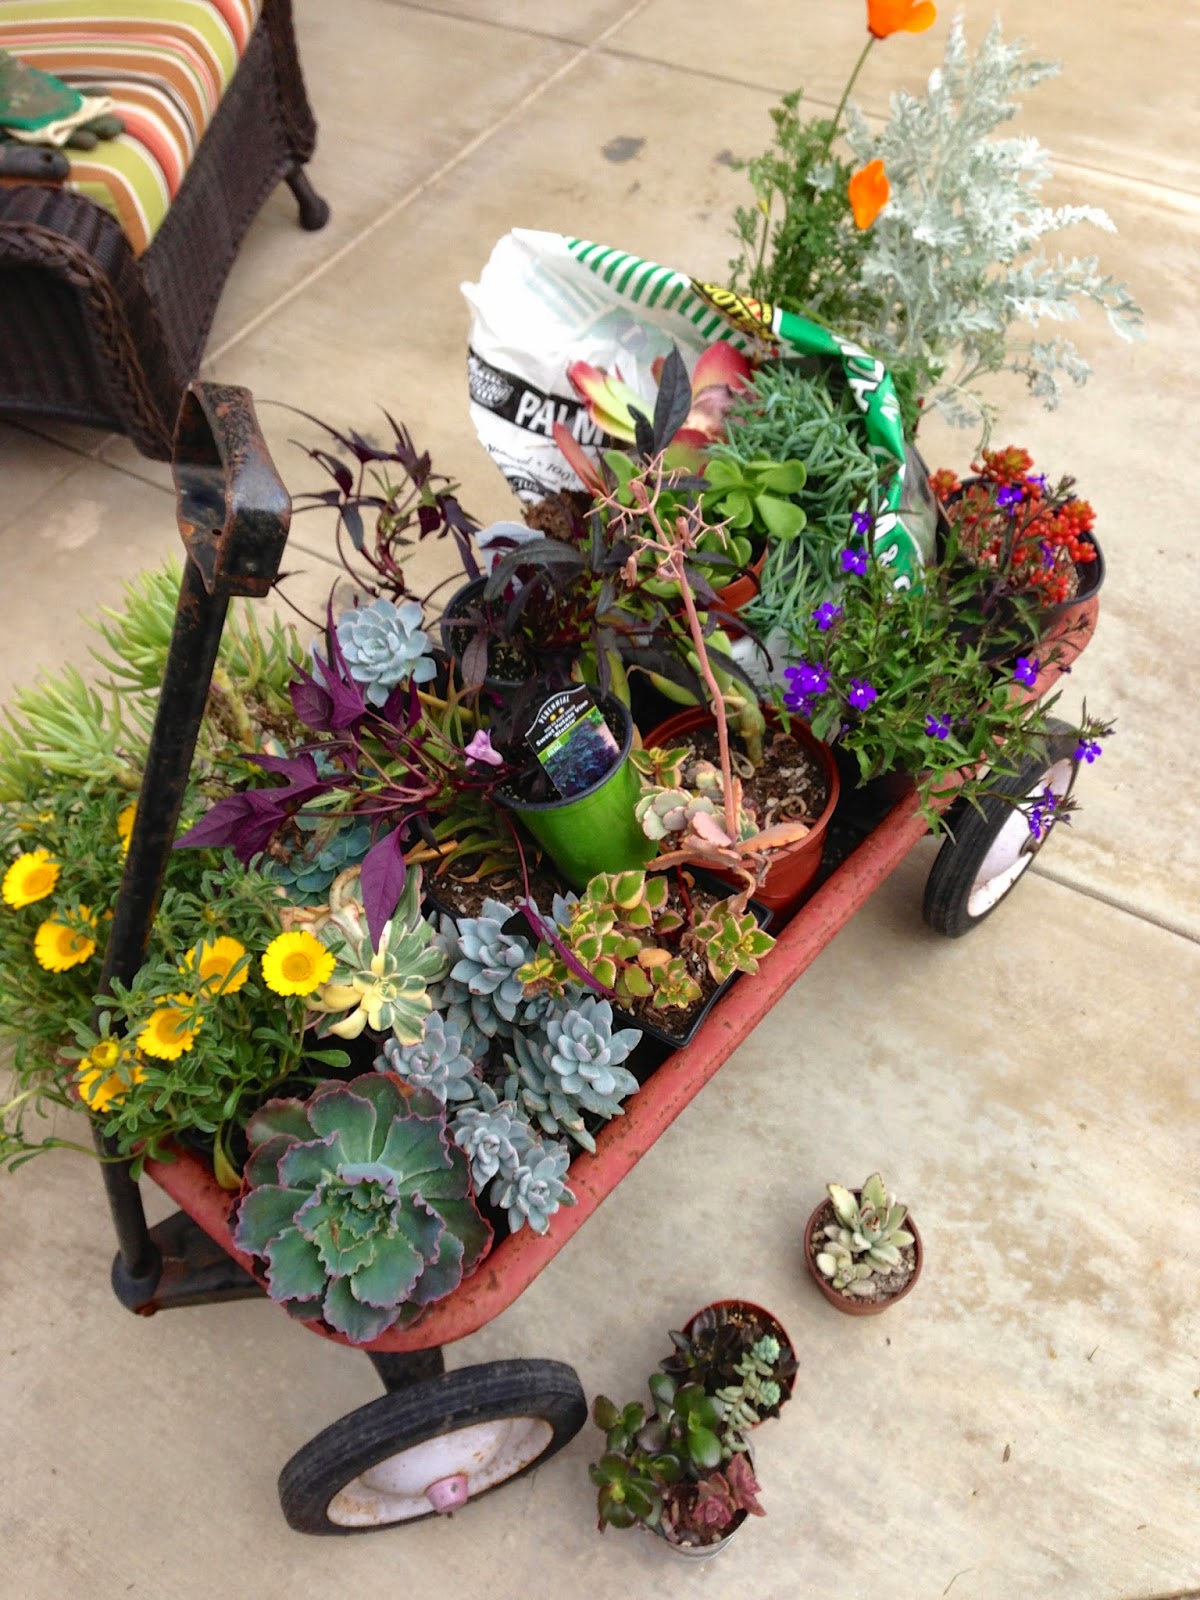 |
| Love my vintage Radio Flyer for moving plants and soil around my yard. |
Many of these plants were already in my personal nursery but I did spend about $60 on new plants and succulents. I use organic cactus and succulent mix and I added some organic ammend and also added extra pumice. I put a 2 inch layer of soil along the bottom of the planter. In placing the plants I started with the three focal plants, the yellow daisy, the Dusty Miller and the Echeveria and placed then in the middle and worked out from there.
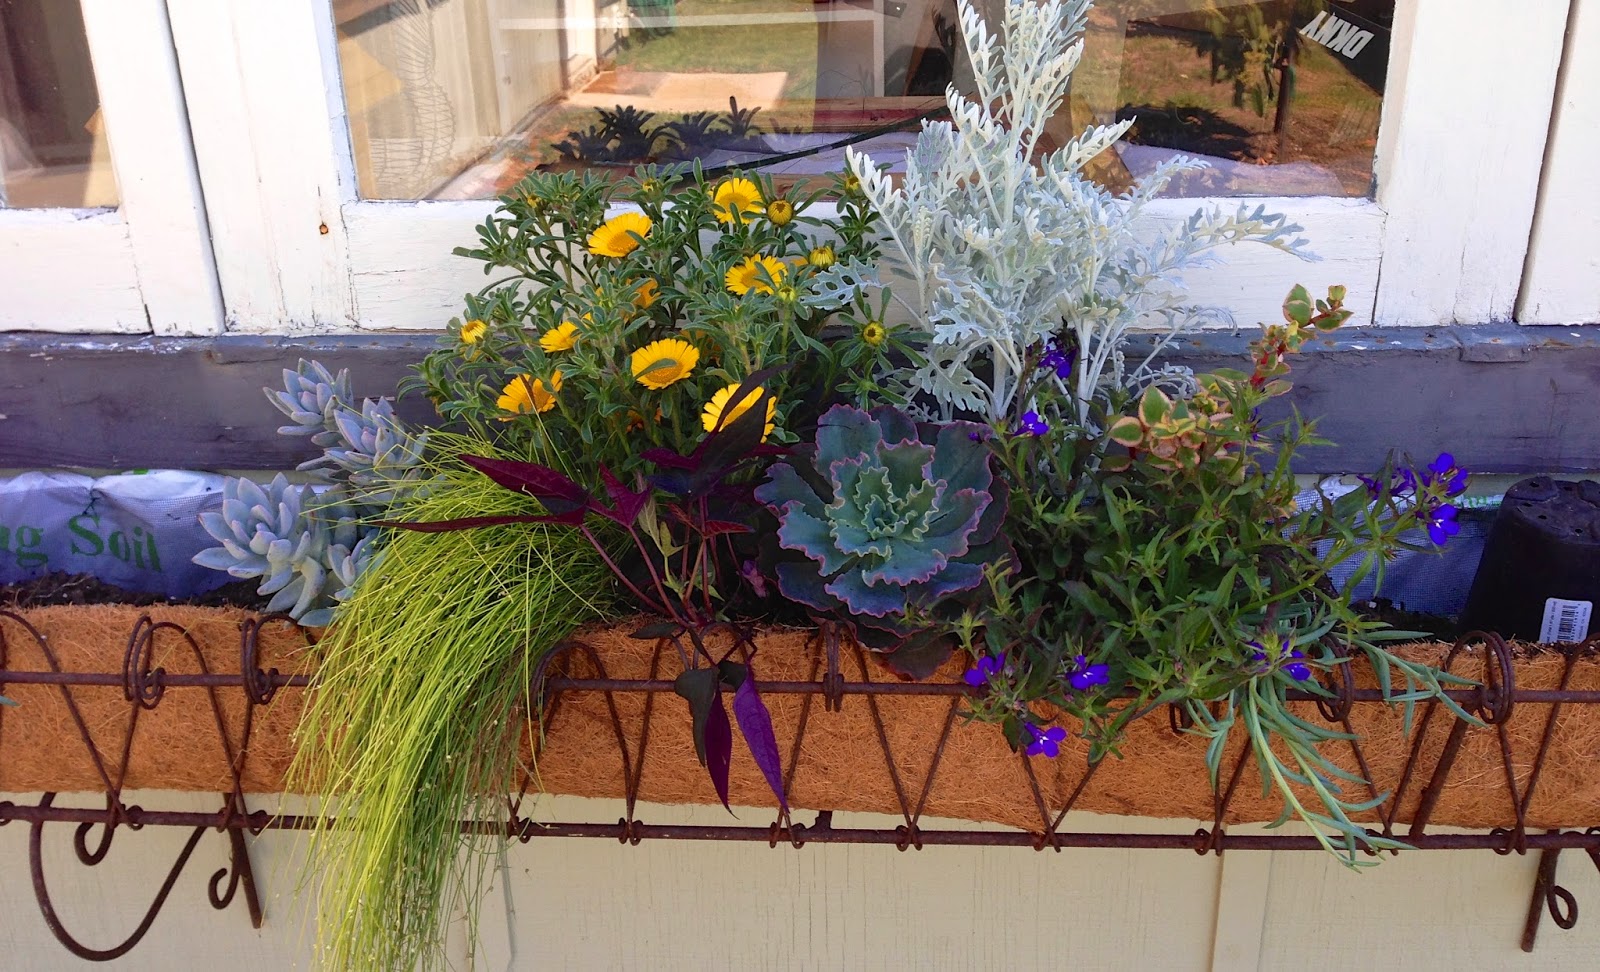 |
| Start in the center and build out from there. |
It was fun to add plants and cuttings that friends and family had given me plus many that I had grown from cuttings. And of course all my new plants! One by one it really came together fast.
 |
| Up close - left side |
 |
| Up close - center |
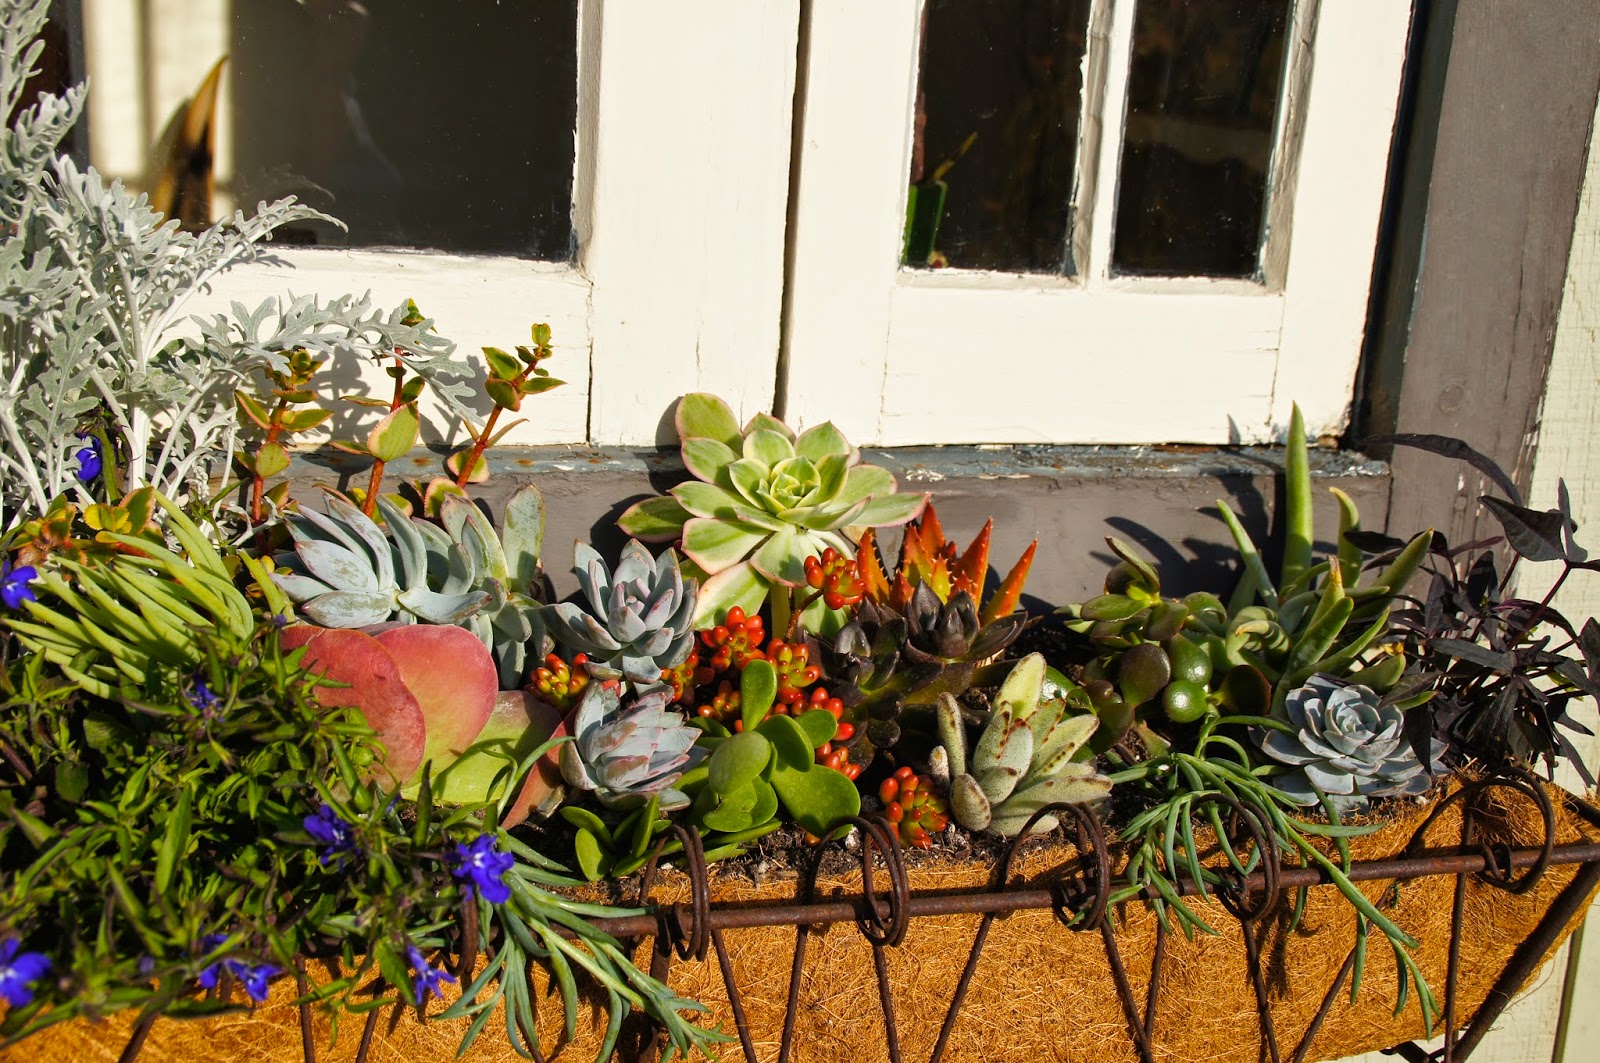 |
| Up close - right side |
This is mounted on the side of a shed in our back yard that serves as my art studio. It is a welcome addition to our yard and will be a great thing to see when we look out our family room window. I look forward to watching it grow.
Make sure to click, like and share my Facebook page for more great ideas and photos:

I love it! Hey in order for people to follow your blog you might want to go into the template and add a widget for following by email address. Then whenever you do another post they get an email. Otherwise they will forget.
ReplyDeleteI wish I knew more how to make my blog better! Thanks for the tip, I think I did it correctly last year when you made this comment. No subscribers though. LOL
Delete